Hair Tie 120-cell

Image by Lucas Garron

About two years ago, I decided to make a 120-cell out of hair bands. I had just come back from Gathering for Gardner 10, where I had helped my friend Zach Abel build a cool, giant rubber band sculpture. This sculpture was fantastic and I loved how boingy it was. I was incredibly inspired by his idea and technique of using elastic bands to create geometric sculpture, and I wanted to try making my own.

2012-03-31 17.04.15

Shortly thereafter, Vi Hart asked me what my favorite polychoron was, a question to which I immediately answered “the 120-cell“.

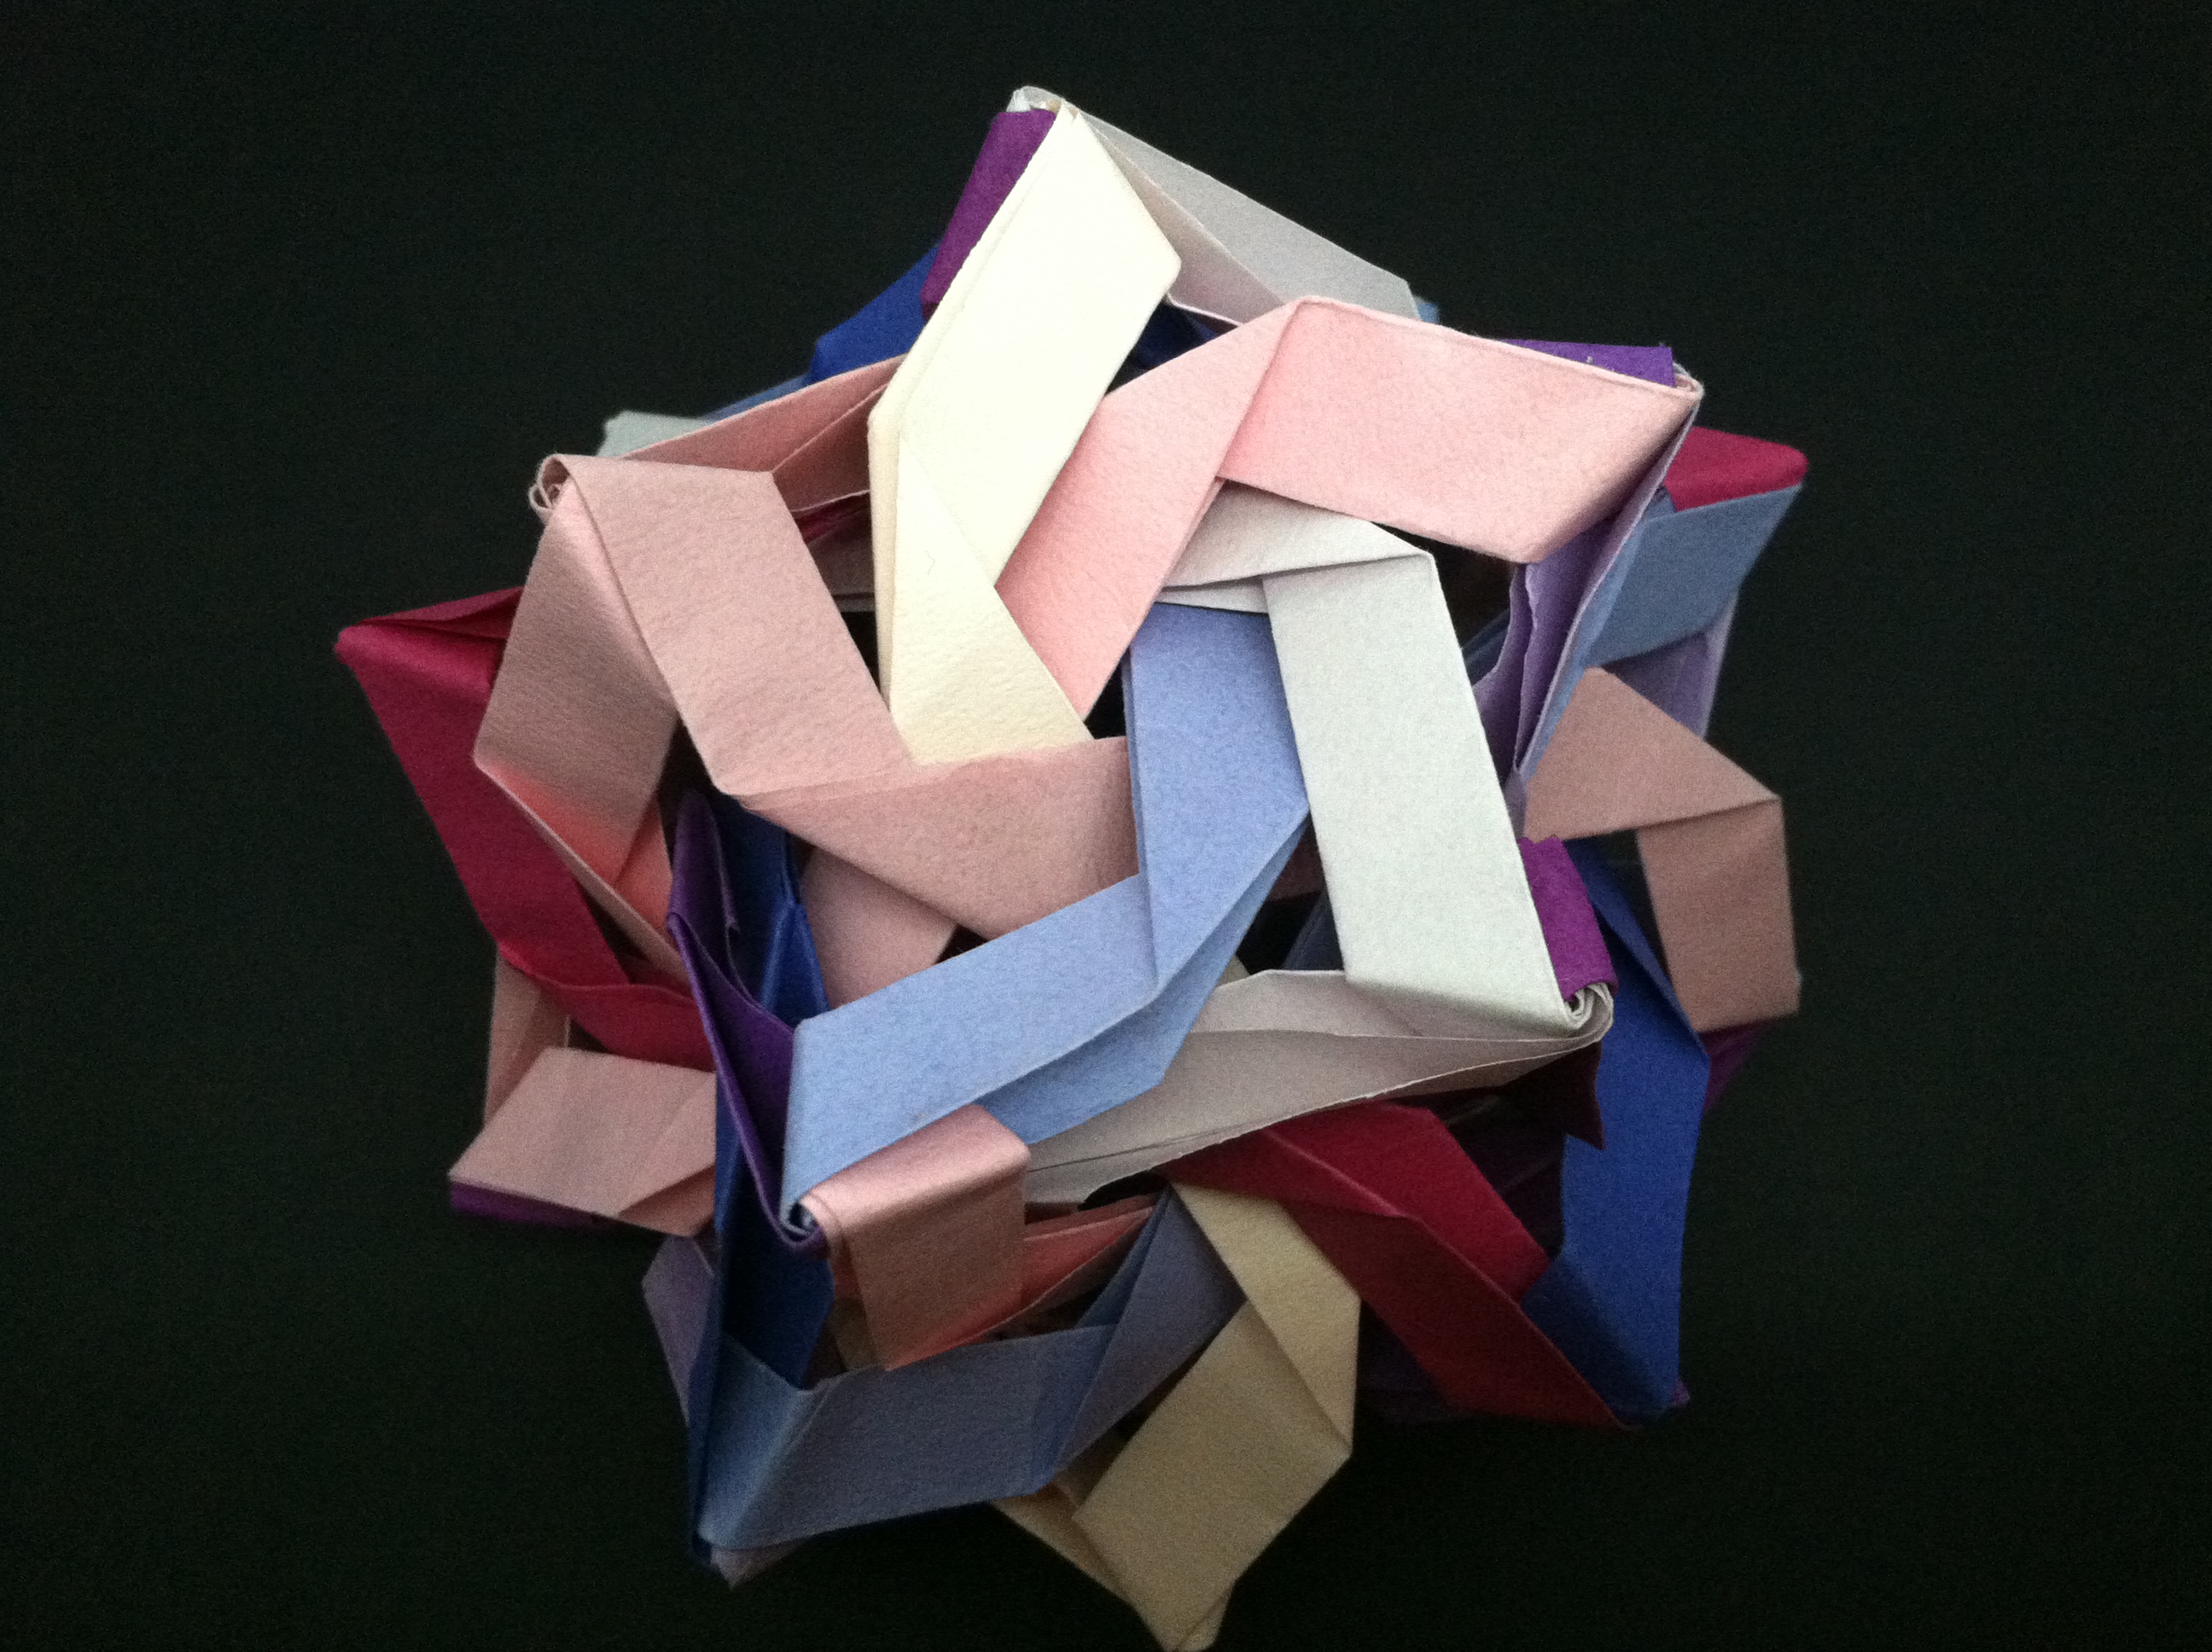
See, my favorite number is five (a long-standing fact that first emerged when I was 5 years old), and, by extension, my favorite polygon is the five-sided pentagon. It naturally follows that my favorite polyhedron is the regular dodecahedron comprised of 12 regular pentagons. The 120-cell, made out of 120 regular dodecahedra, was basically a shoo-in for my favorite 4-polytope.

photo 2 (2)

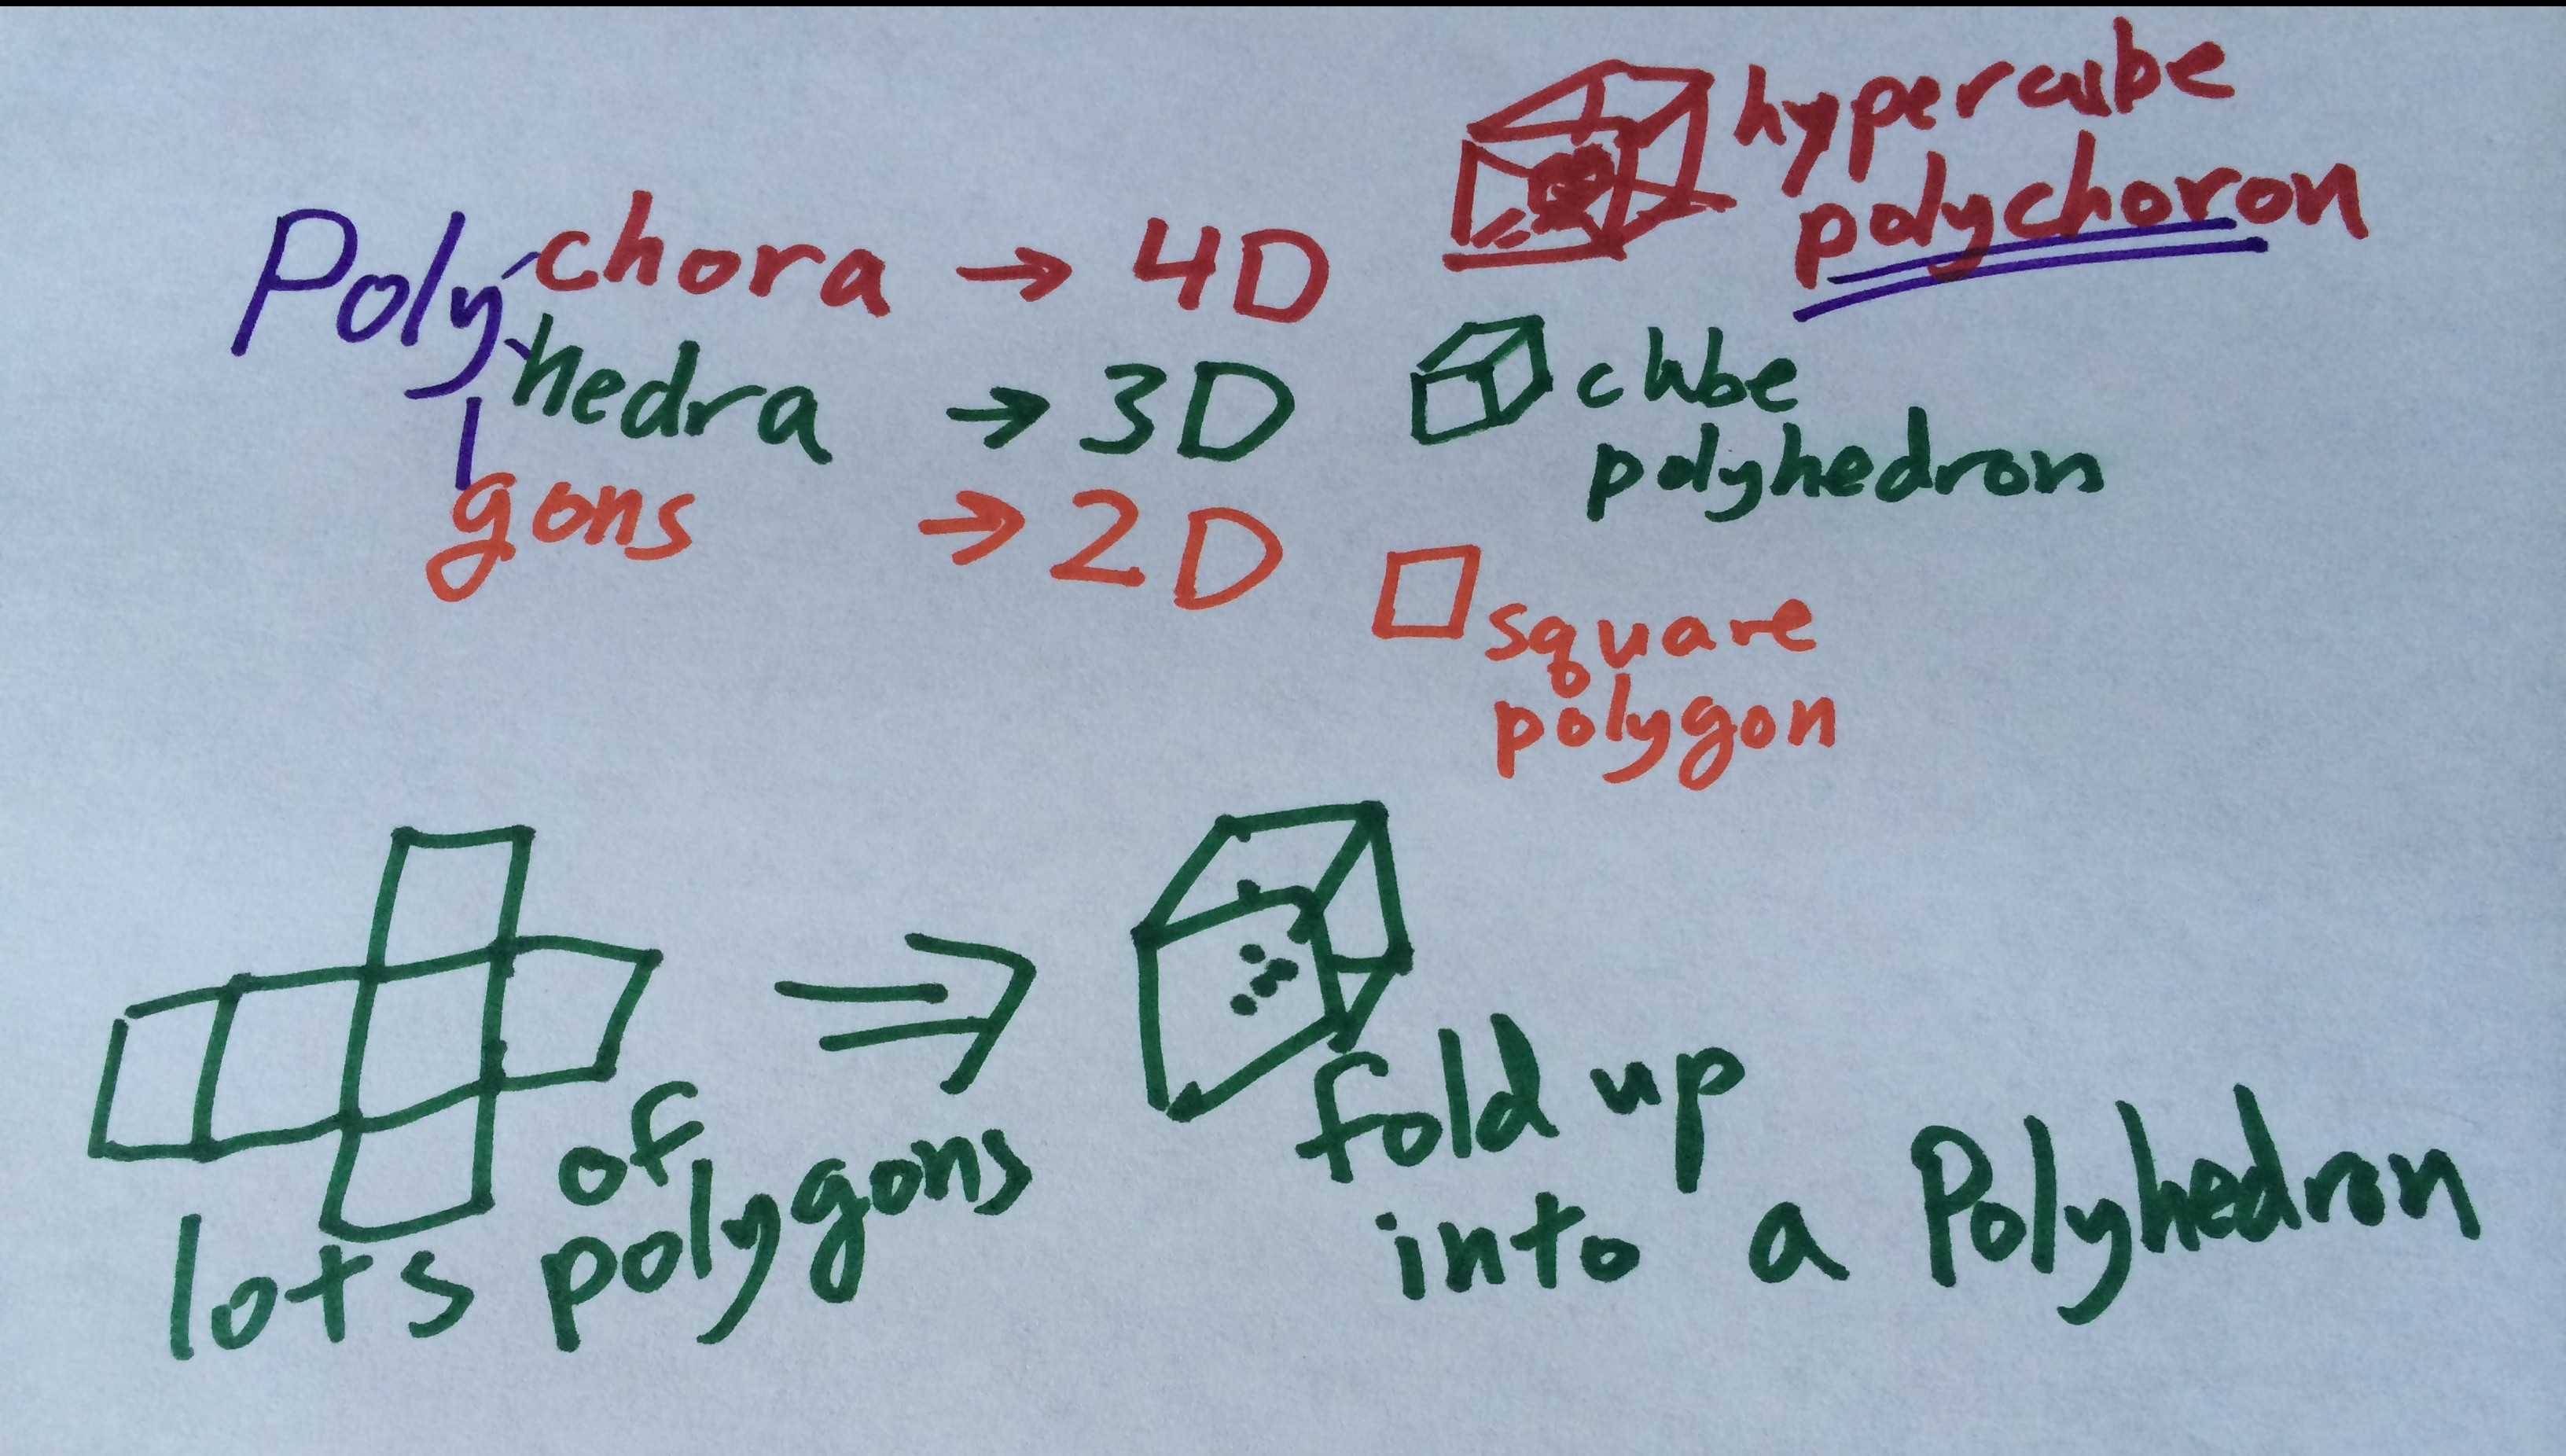
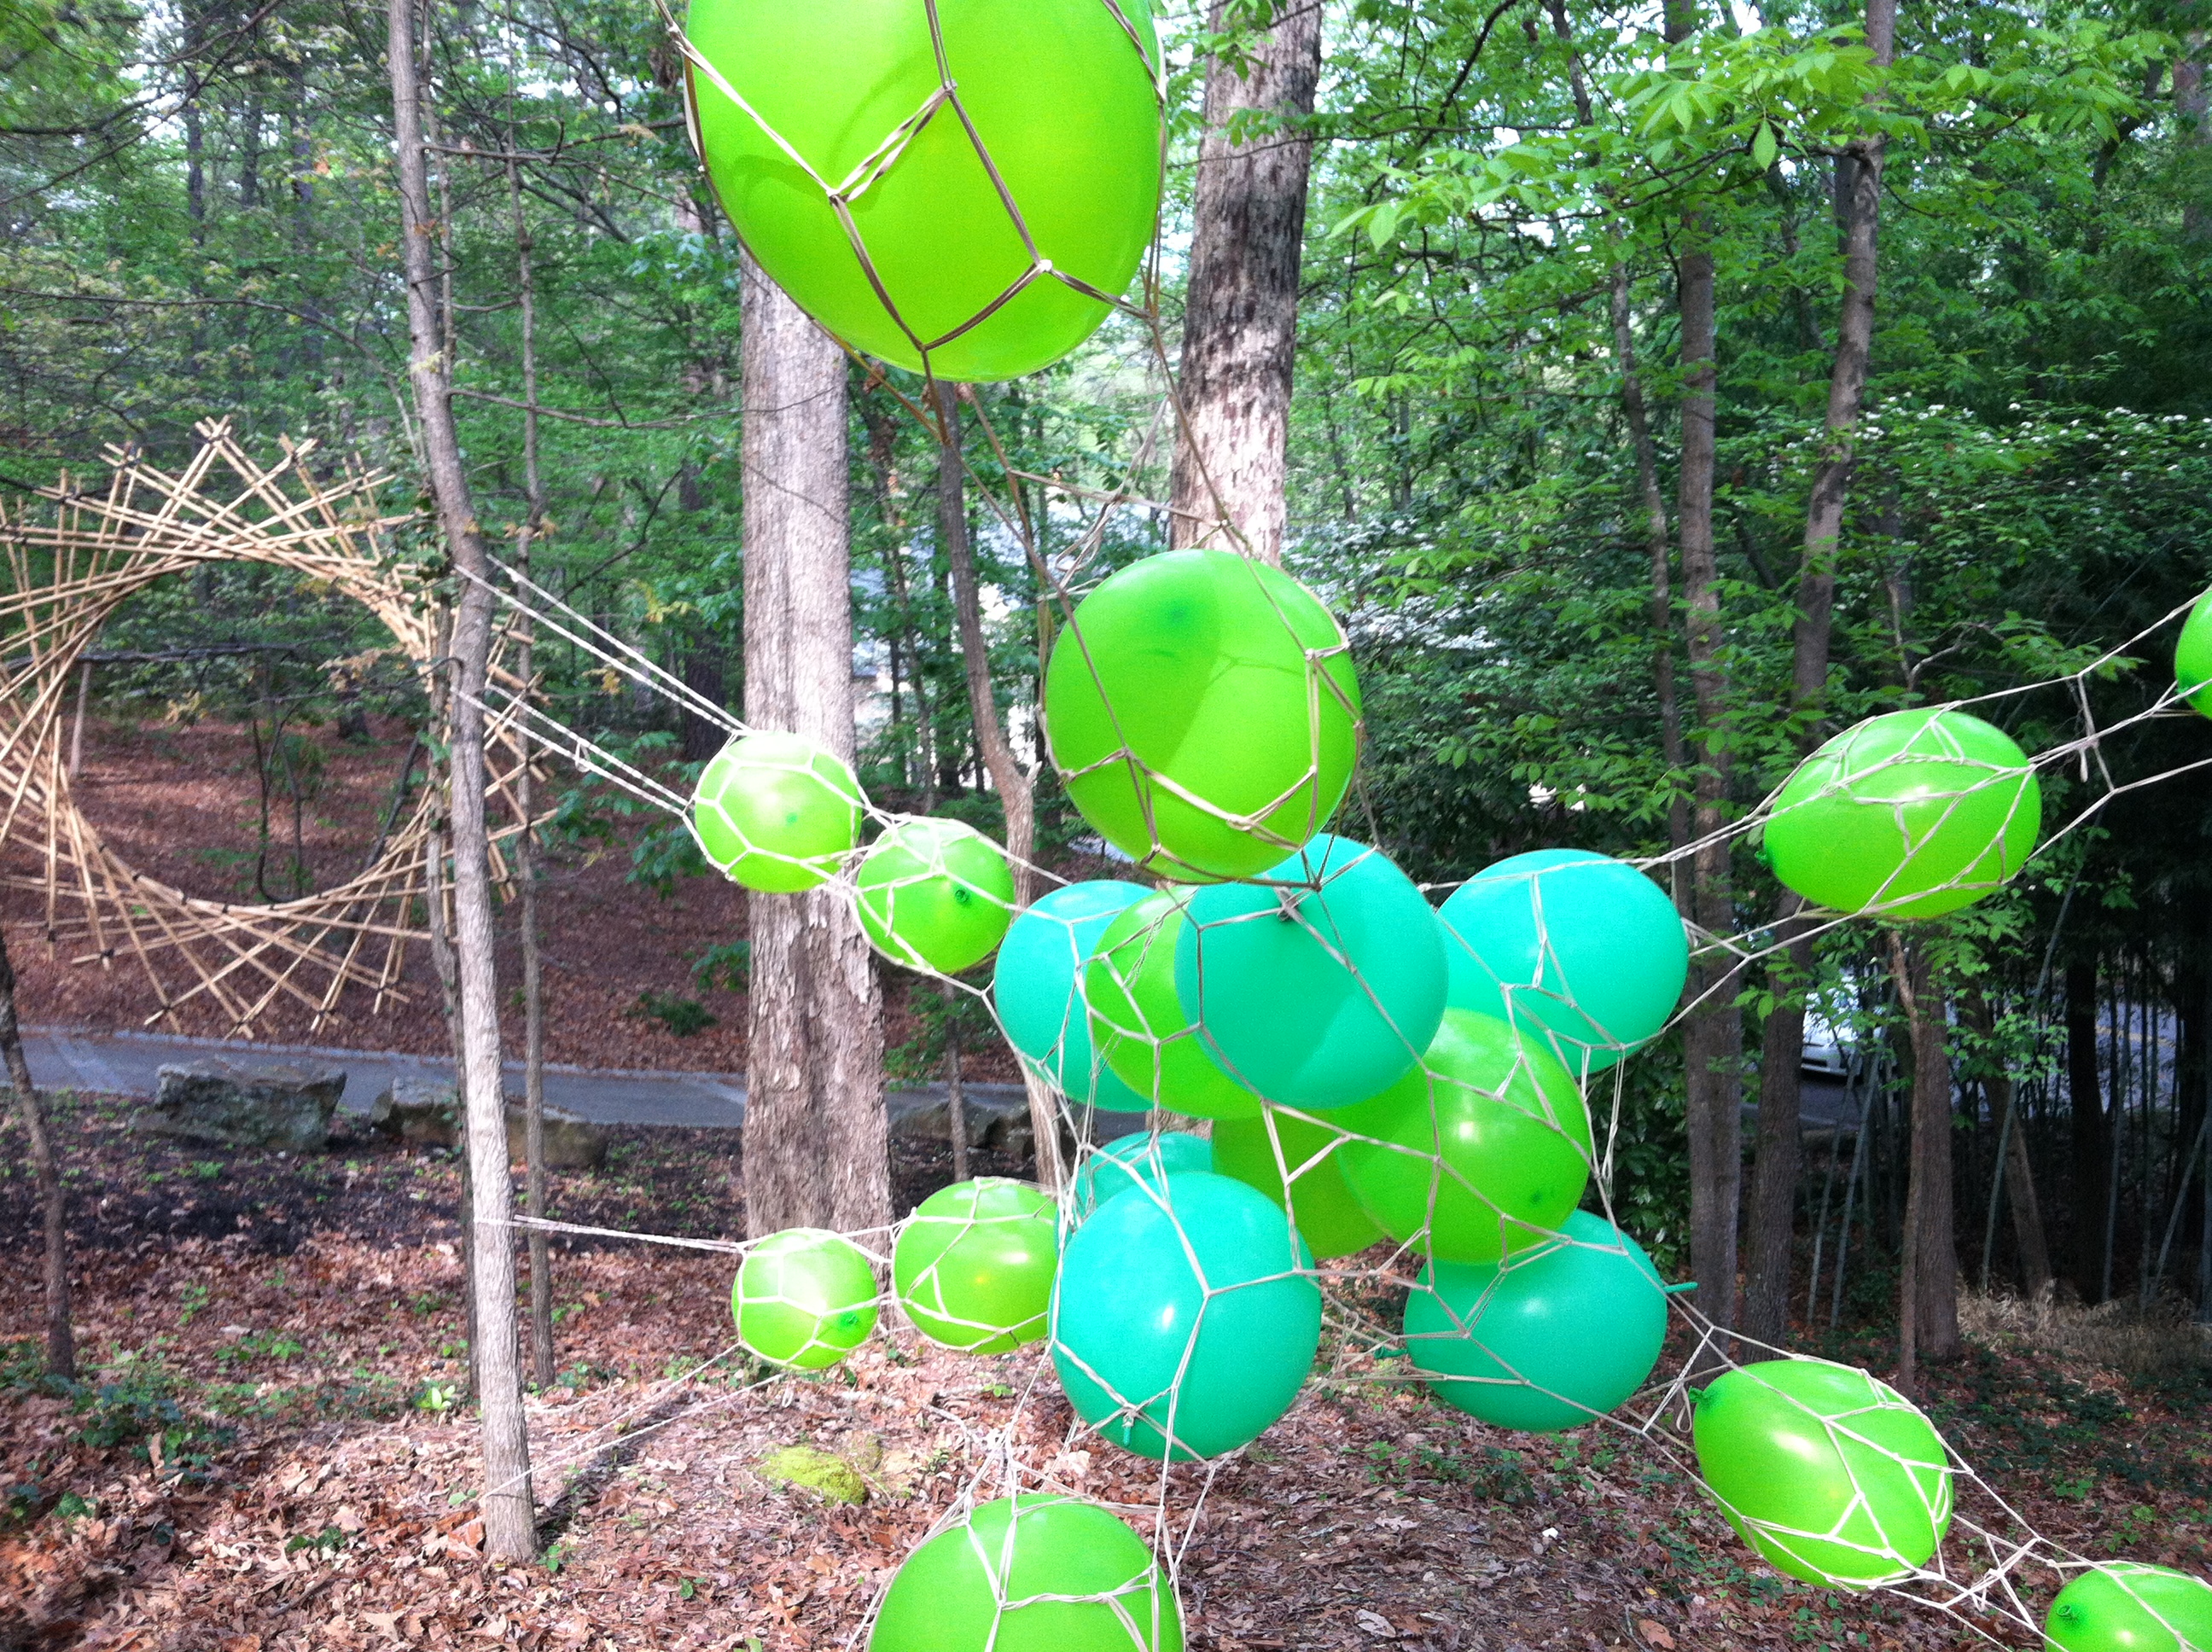
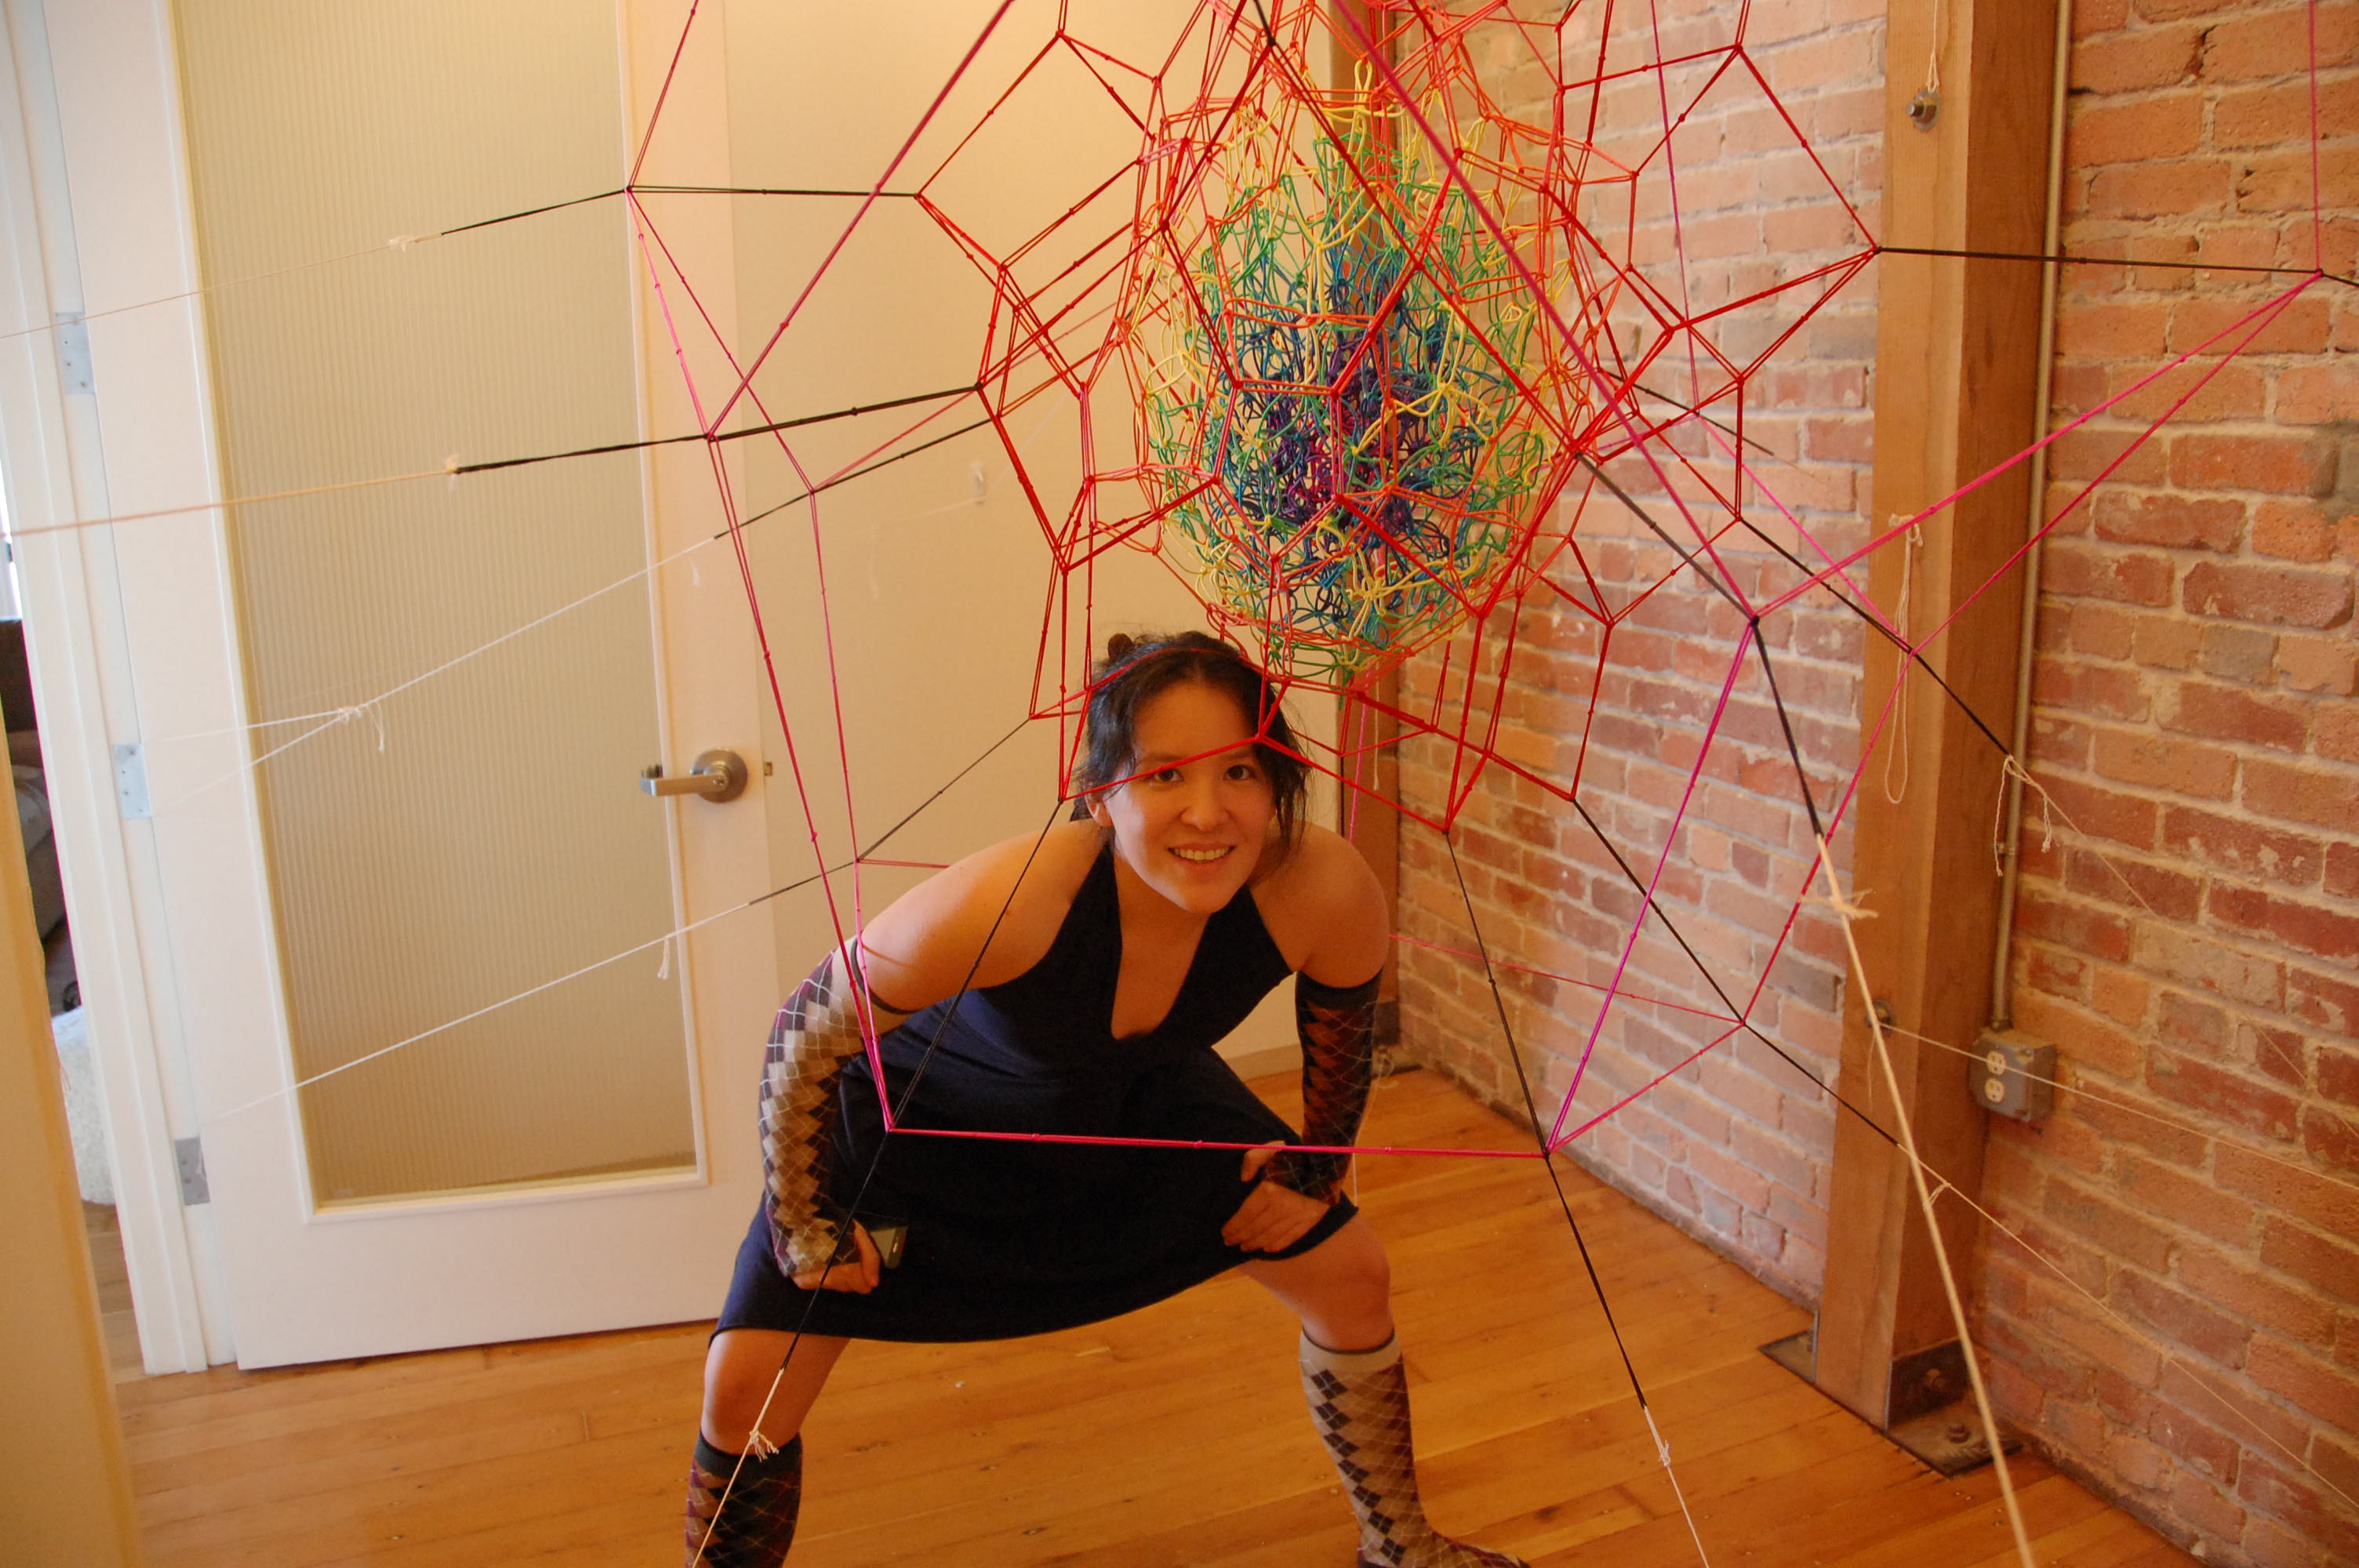
Thus, when I discovered CVS selling colorful hair bands by the hundred, it seemed obvious that I needed to make a giant, bouncy (projection of a) 120-cell out of them. Hair bands seemed like a natural thing to use for a 120-cell. Their natural stretch means that you don’t need to get the lengths exact (just close), they come in all kinds of colors, and they have a truly delightful sproing to them which encourages people to really interact with the final sculpture.

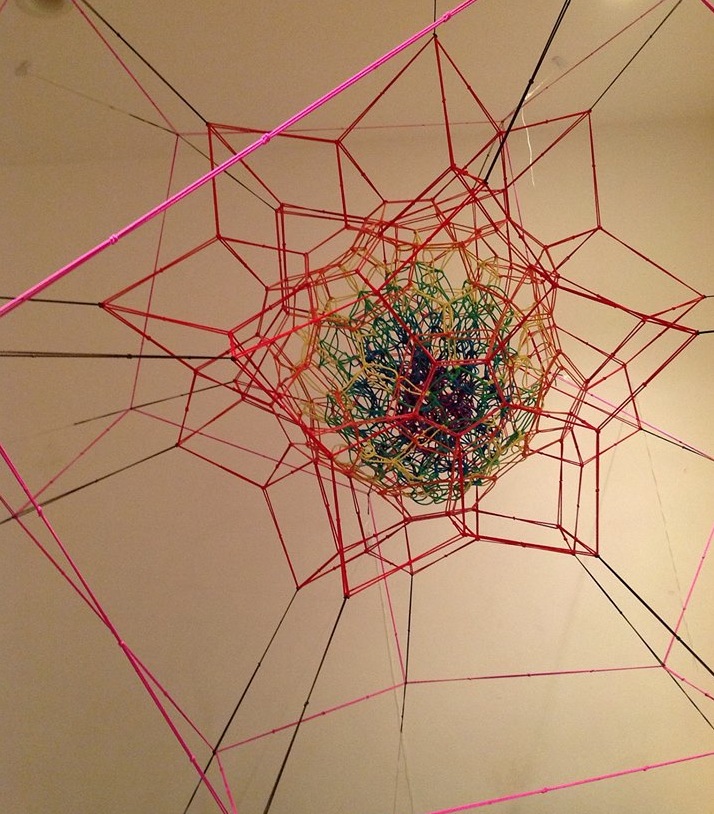
I immediately purchased 600 hair bands (buying out the CVS in question), and got started. I particularly like the way that the Schlegal diagram of the 120-cell shows all of the edges and vertices and has a regular dodecahedron in the very center and one on the outside, so I knew that my 120-cell was going to use that projection and have 1200 edges, so this seemed like a good start. I assumed that I would be able to return to the store once I’d used up my hair ties and buy some more. Unfortunately, what I hadn’t account for was that CVS doesn’t actually restock that quickly. Moreover, since only the innermost edges of the sculpture were a single band length, and I was using a color scheme to keep track of my place in the sculpture, I was going to need way more than 1200 hair ties.

In desperation, I tried hair tie shopping at a different local store, but they didn’t have the same hair bands. I ended up buying out 5 or 6 CVS all across the Bay Area to finally end up with enough hair bands for my sculpture.

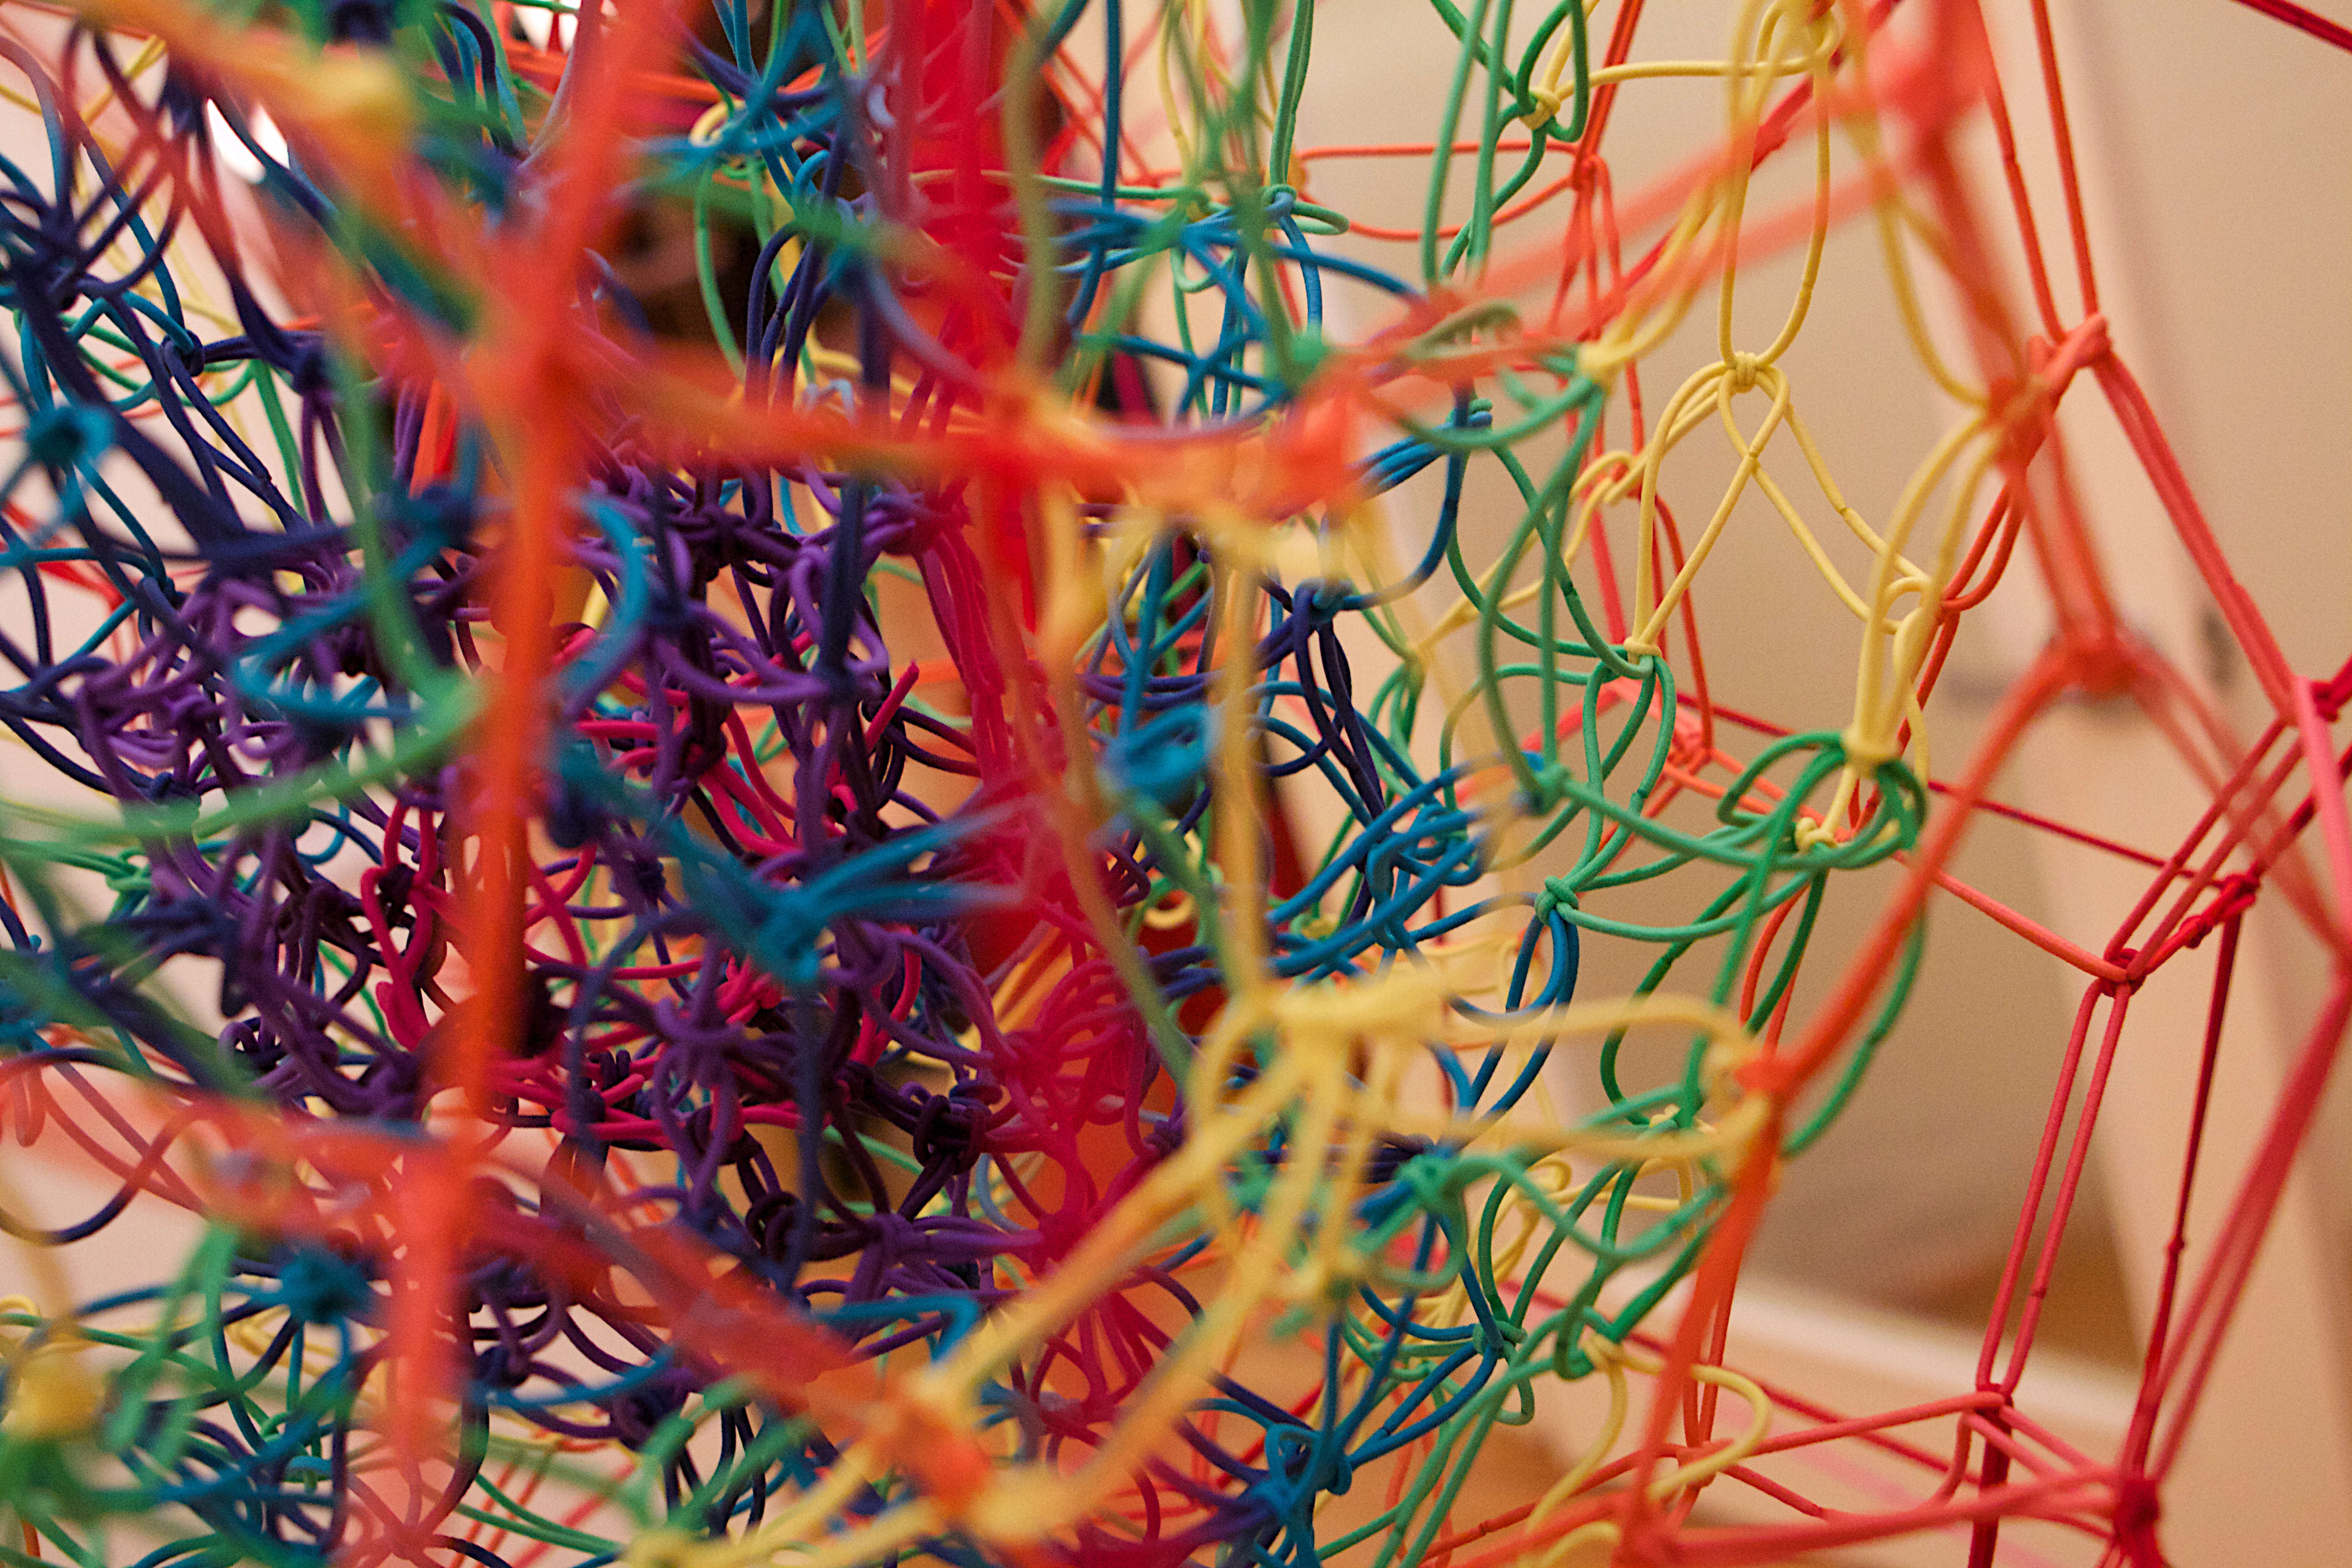
With the structure completed, I ran into a different issue. The sculpture was going to be huge and was going to need to be stretched out from multiple corners. It was probably going to fill a whole room, and I didn’t actually have a spare room handy. Fortunately, my boyfriend had a small extra bedroom in his apartment, and, one weekend we took a bunch of 3M command strips and attached it above the bed, which was awesome, but also a bit strange. This picture was carefully cropped to hide the bed.

120-cell

Not long thereafter we ended up taking the 120-cell down. Above one’s bed just isn’t a good permanent location, and the 120-cell languished in a bag for over a year before I had another opportunity to put it up in a small room in the CDG office.

DSC_9335

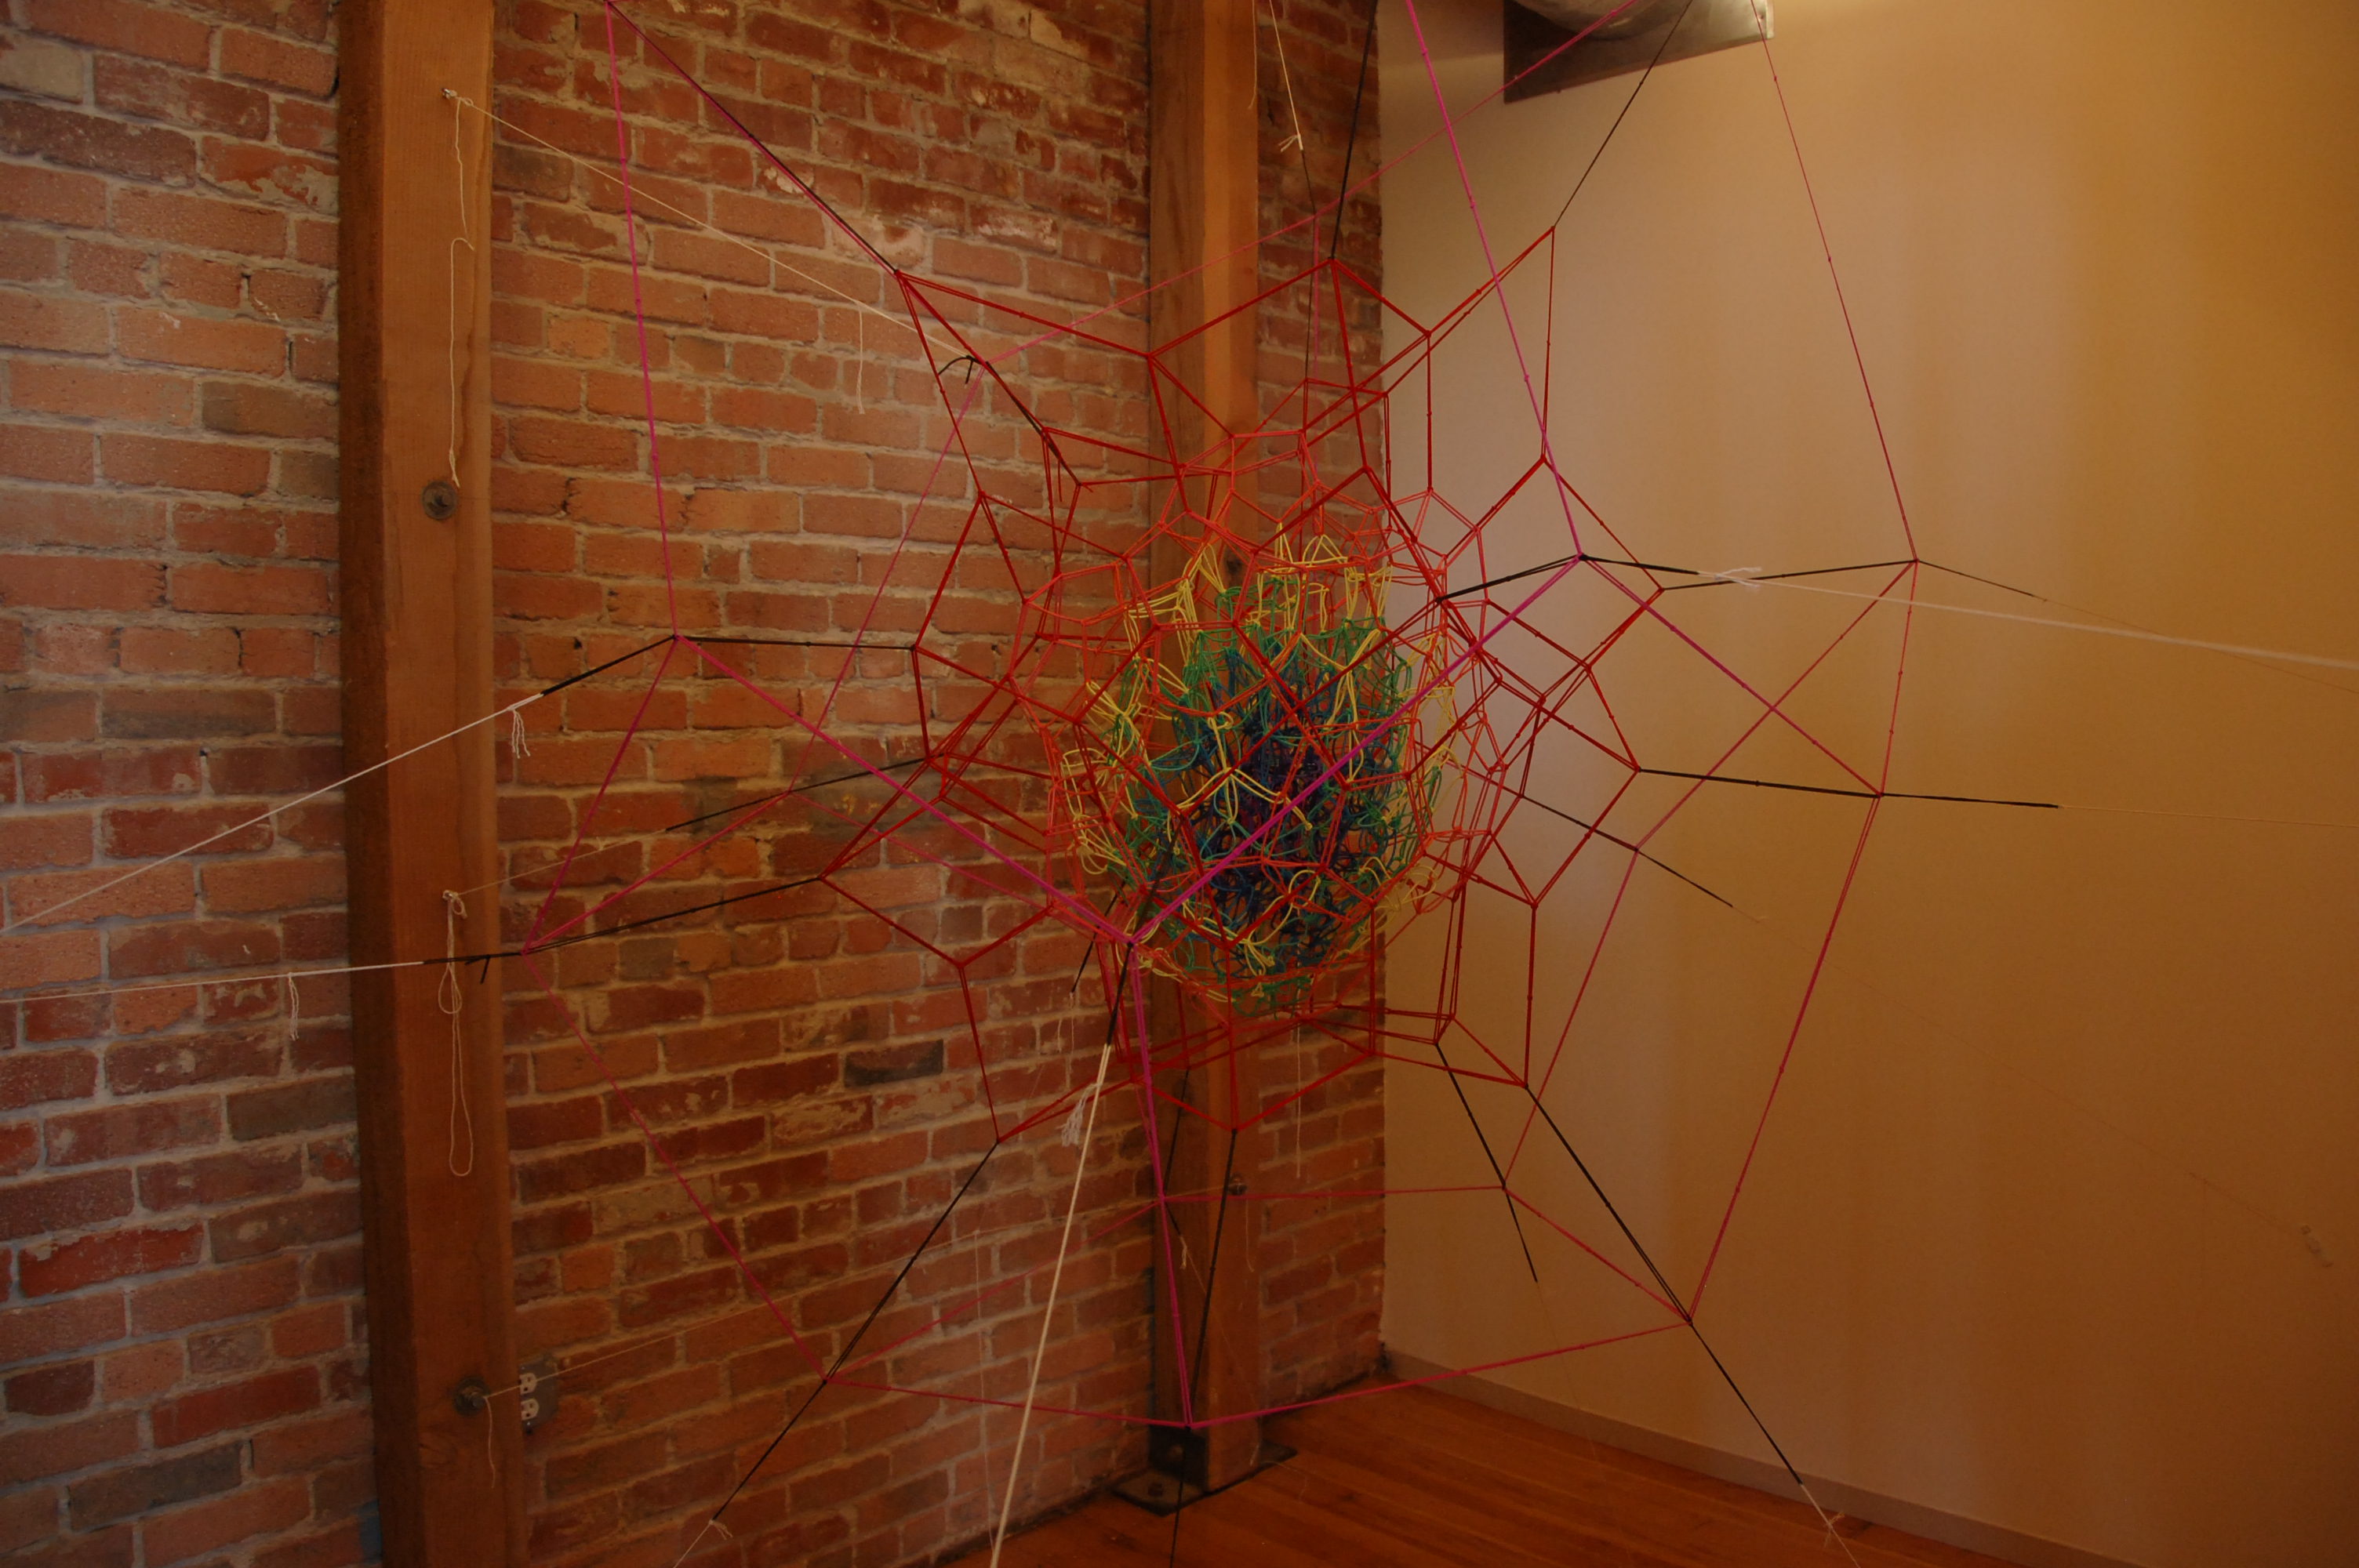
Did I mention that the 120-cell is rather large?

Check out this Youtube video to learn more about the hair tie 120-cell.


Zip Tie Tangle

Zip ties are a great way to tie things together, from cables to people. They are extremely difficult to take apart non-destructively once they have been “zipped”, so you have to be careful when trying to build something out of them, but having a built in connection mechanism makes building things “easy”.

Which is to say that it’s easy to build things as long as you want to make long strips or rings of zip tie, but there is no real way to “branch” your rings. Pentagon? easy. Tetrahedron? hrm…

Fortunately, we don’t need nodes of degree greater than 2 to make cool structures. By interleaving rings of zip ties, we can make compounds of regular polygons. These structures are referred to as regular polylinks or orderly tangles.

DSC_9372

Orderly tangles are a nice way to illustrate symmetric colorings. I made this orderly tangle of four zip tie triangles out of four different colors of zip tie. The resulting structure has octahedral symmetry. If you think of the zip ties as representing edges, and the spaces between them as faces, the resulting structure in the middle can be thought of as a woven cuboctahedron.

Since the zip tie triangles have a chirality to them, the final sculpture also has some chirality. Keeping the chirality straight during construction may be the most difficult part of making this piece.

DSC_9371

Many other tangles are possible. A tangle of six pentagons is tricky (and I don’t have that many colors of zip tie), but would demonstrate a similar symmetric coloring of the icosahedral group. Let me know if you try making one!

Fibonacci Lemonade

How would one make mathematical cuisine? Not just food that looks mathematical (like math cookies), but something that you truly have to eat and taste in order to experience its mathematical nature.

Henry Segerman proposed this question, and today we had our first experience tasting the answer. A masterpiece of mathematical art, the answer I came up with is simple enough that anyone can make it at home, surprisingly visually beautiful, delicious…

Layered Drinks!

fibDrinkIce

Not just any layered drinks, of course. In our layered lemonade, the intensity of flavors as you go down the layers increases exponentially. The sugar and lemon juice proportions for the same quantity of liquid increase according to the Fibonacci sequence. The sweeter layers are denser and naturally keep separated lower down. Indeed, the nature of layered drinks is that they are monotonically increasing in sweetness (and/or decreasing in alcohol). Thus, there is an intrinsic mathematical property to all layered drinks.

Additionally, the ratio of sugar to lemon juice in our lemonade isn’t constant. The top layer of our drink is 1 part lemon, while the second layer is 1 part sugar syrup. Following the Fibonacci rule, each subsequent layer has proportions that are the sum of the previous two layers proportions.

Layer 3 is 1 part lemon, 1 part sugar. Layer 4 is 1 part lemon, 2 parts sugar, and so on.

Generically, for layer n > 2, there are fib(n-1) parts sugar and fib(n-2) parts lemon juice. These are adjacent Fibonacci numbers, so as the drink is consumed the ratio of lemon to sugar approximates the Golden Ratio. This drink may be the worlds first tastable example of the relationship between the Fibonacci sequence and the golden ratio!

Surprisingly, using golden ratio relative proportions of lemon juice and simple syrup actually seems to make rather good lemonade. When consumed, the beverage starts out fairly flavorless, then rapidly ramps up. It also alternates between being a bit sweet to being slightly sour (of course this is a matter of personal taste), as the approximation of the golden ratio alternates between being slightly high and slightly low.

You too can make Fibonacci lemonade and experience the taste of exponential flavor, the golden ratio, and the Fibonacci sequence. Just follow the recipe below!

fibDrinkIce2

Ingredients and Materials:

Lemon Juice
SImple Syrup (1 cup sugar dissolved in 1 cup water)
Water
Food Coloring (optional but makes it pretty)
Ice or a spoon for slow pouring (the ice free strategy is much harder)

The Method

You must start with the sweetest and densest layer and work your way backwards up the drink. I describe the layers for a 7 layer drink below, although you may choose to make a different number of layers to start. The drink could also be made without the first layer, in which case it is neatly just two offset increasing Fibonacci sequences, one per ingredient.

First, fill your glasses with ice. Then, do the following steps for each layer. Finally, sip your mathematical masterpiece.

  1. Add the proportions of lemon juice and simple syrup indicated below to your liquid measuring cup.
  2. Add food coloring if desired.
  3. Fill measuring cup to the 4 oz. (1/2 cup) line.
  4. Stir to blend all ingredients in your measuring cup.
  5. Slowly pour a layer from your measuring cup into your drink glasses. You want to pour directly onto an ice cube, the ice cubes are there to slow down your liquid as it goes down the cup and to help keep the layers distinct. (You can pour the first layer normally)

The Layers

  1. 1 tsp. lemon juice
  2. 1 tsp. simple syrup
  3. 1 tsp. lemon juice, 1 tsp. simple syrup
  4. 1 tsp. lemon juice, 2 tsp. simple syrup
  5. 2 tsp. lemon juice, 3 tsp. simple syrup
  6. 3 tsp. lemon juice, 5 tsp. simple syrup
  7. 5 tsp. lemon juice, 8 tsp. simple syrup

Tips

  • Many simple syrups are 2 parts sugar to 1 part water. If yours is like this, halve the amount of sugar you are using (or it will probably be far too sweet).
  • For a more authentic, less watered down experience, you need to make your drinks without ice. This is much harder, and I don’t actually recommend it unless you are patient or really know what you are doing. You can find directions for layering without ice here


Polly wants a Parrotohedron

photo 2

Last week, I looked out the window of my office and saw a parrot. Two of them actually. Apparently San Francisco is home to a wild colony of escaped (released?) Cherry Headed Conures. There is even a documentary about them, but somehow I had seen nor heard of them before.

photo 4
I promise, these birds were parrots.

Walking back to my desk, I had a moment of inspiration.

Parrot. Pyrite. Pyritohedron.

I needed to make a Parrotohedron.

The internet is kind of amazing, and I quickly found a website that would sell me parrots in 3 different colors for 39 cents apiece. I think they are supposed to be used as accents for floral centerpieces; I have no idea how anyone is making a profit selling them at that price.

A parrotohedron obviously needs to be pyritohedral, so I started by arranging six sticks pyritohedrally for my parrots to perch on. Then, I arranged 12 parrots (one per stick end) such that each parrot had a friend (and represented one face of a pyritohedron).
parrot-gif
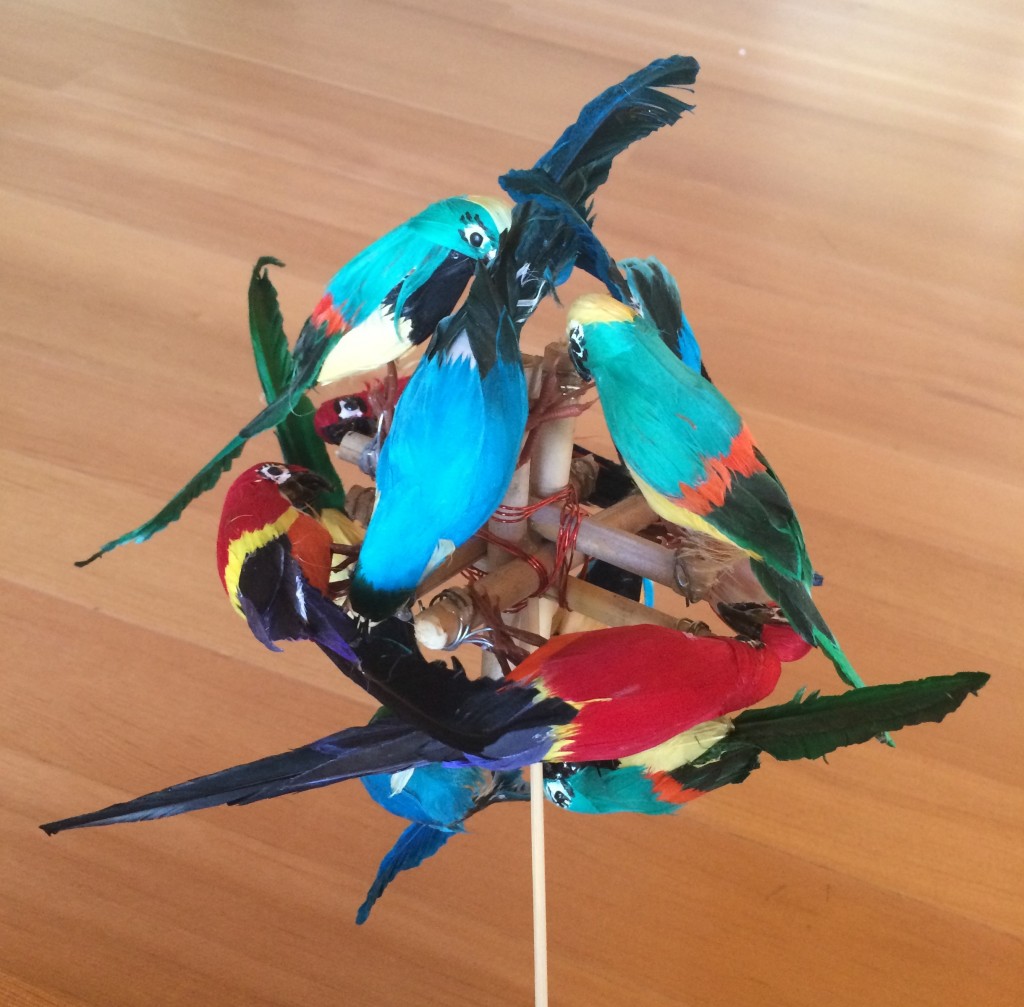
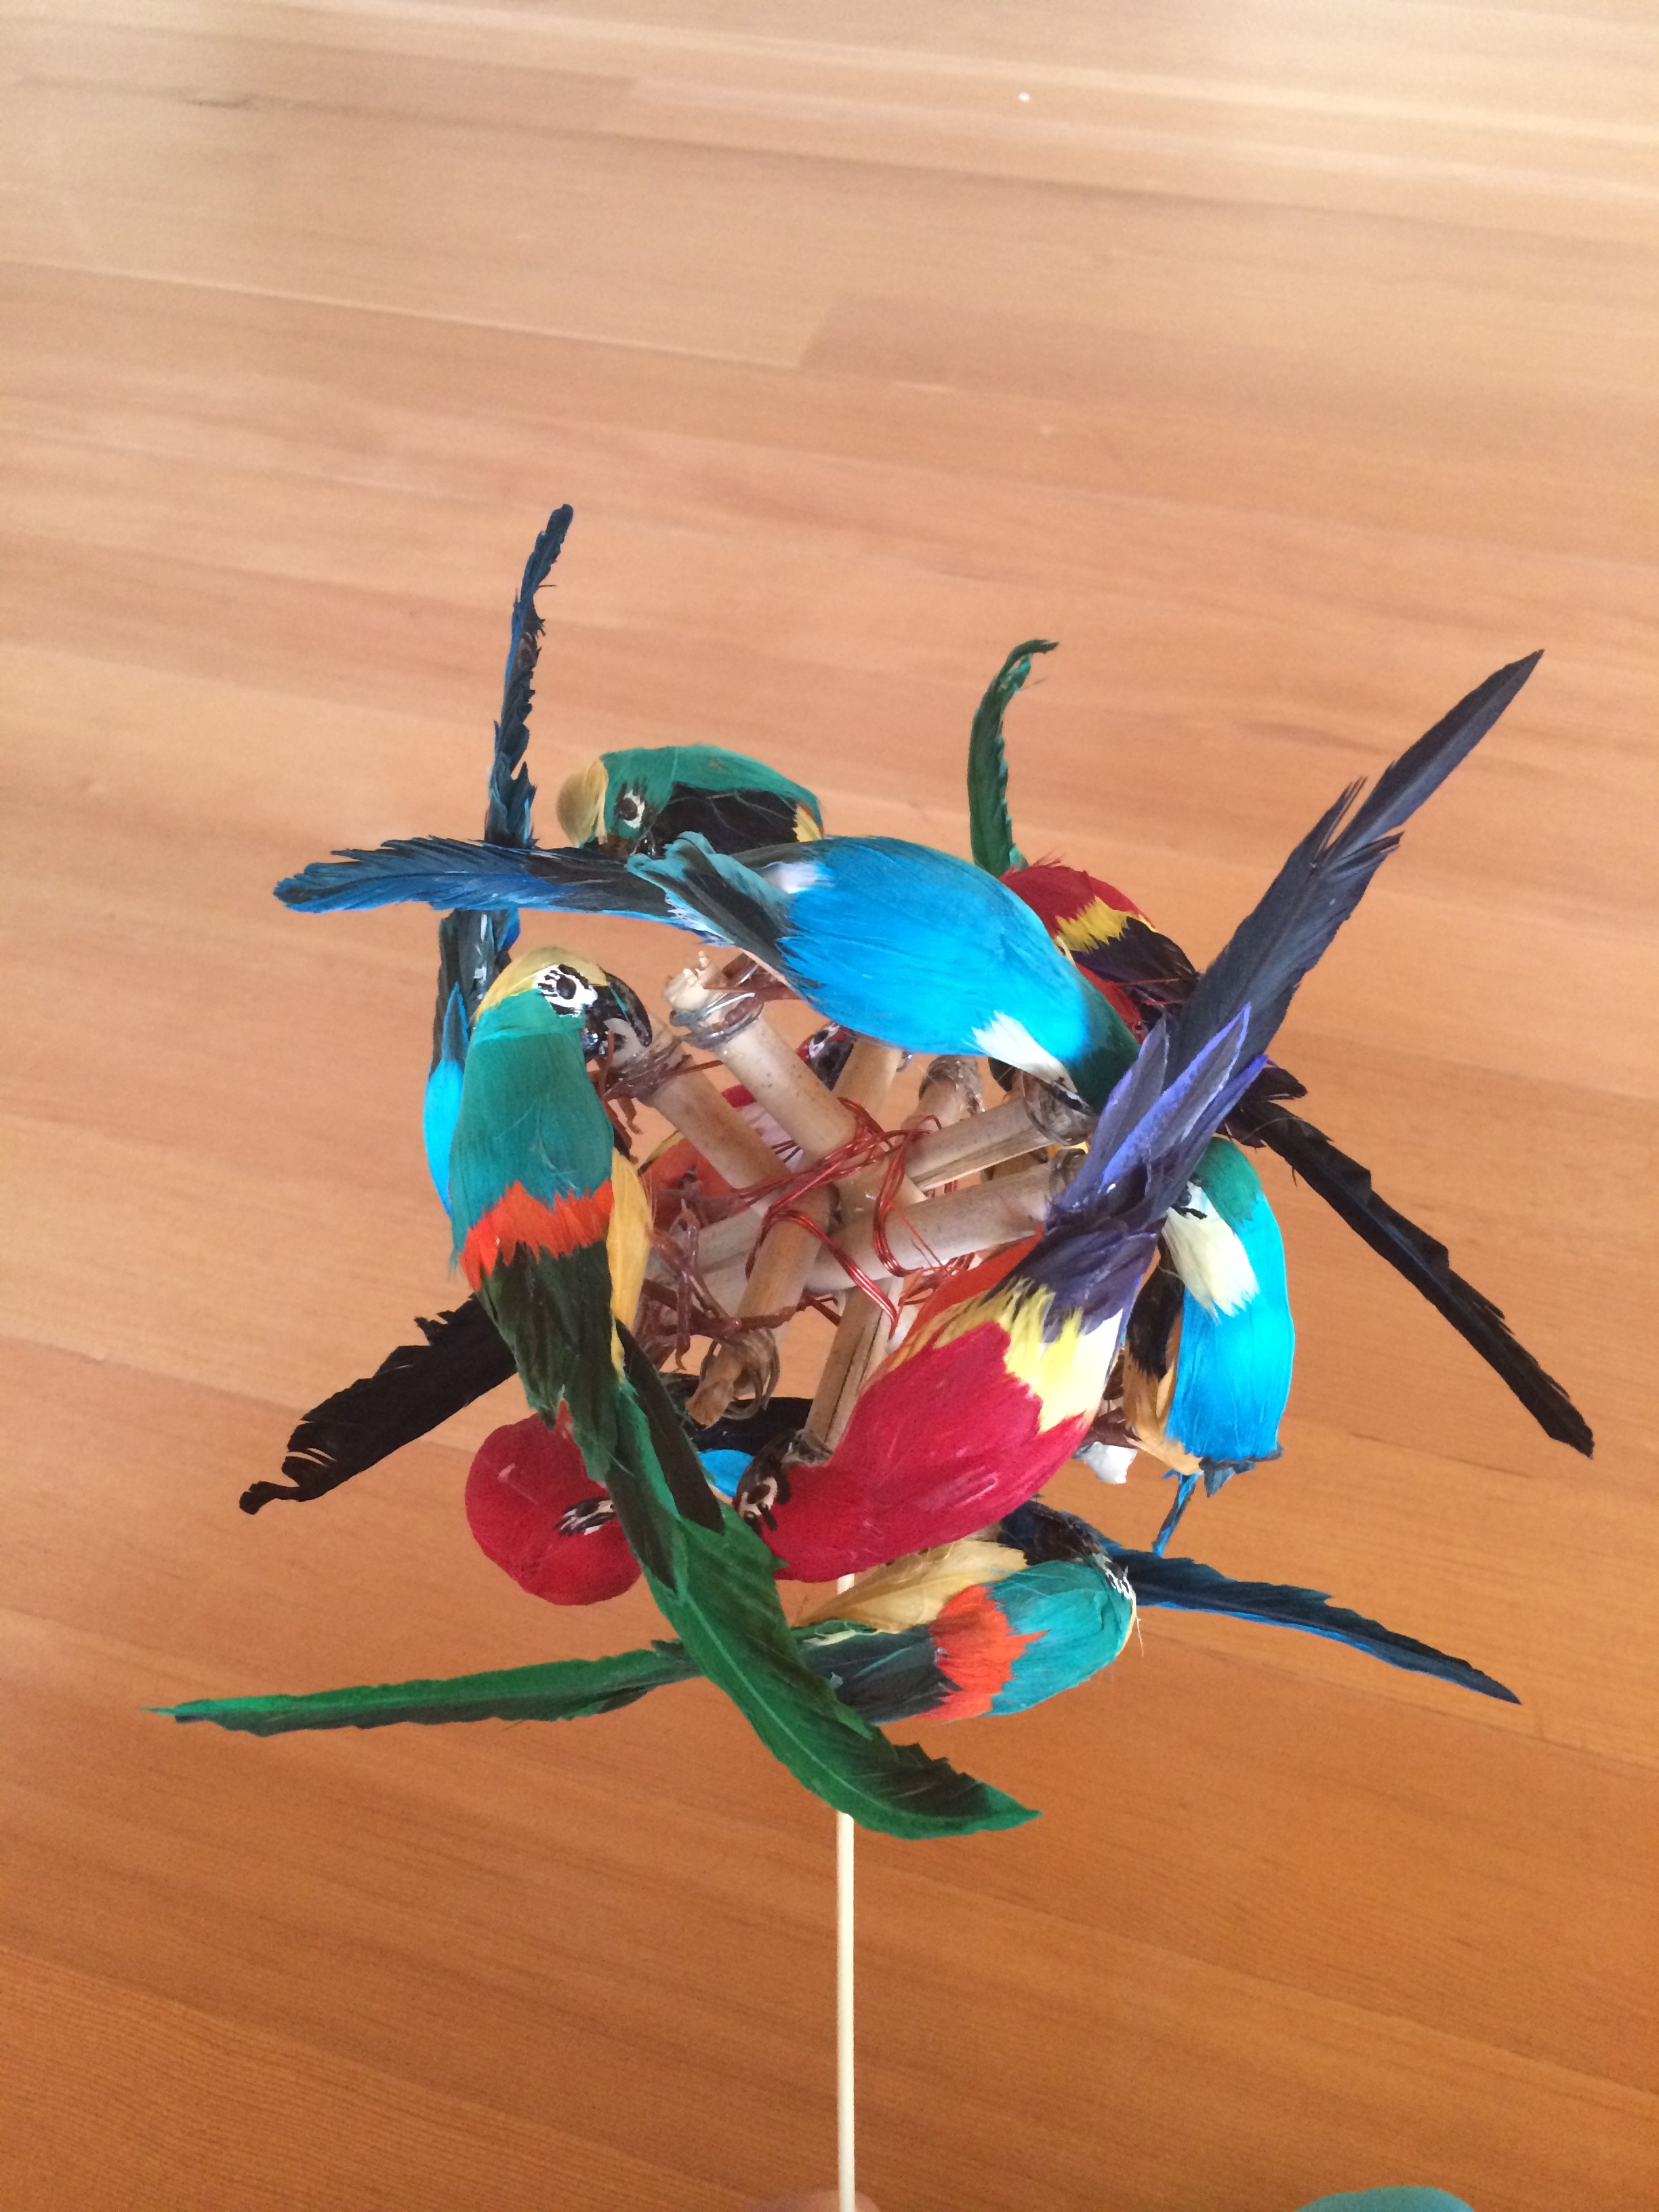
Squawk! It’s a Polly-hedron.

photo 1

But will there be a pirate-ohedron? Only time will tell.

ps. Arrr. Where be my two-dimensional parrot?
pps. Polly gone.

‘Topological’ Origami, the Star Polyhedra Series

starpolyhedra

I first posted about an origami model based on a Star Polyhedron in November 2012, but I knew at the time that many more models were possible based off of a similar idea of taking a Star Polyhedron and removing parts of each face such that some underlying topology of the polyhedra was maintained, but the faces no longer intersect. These representation of a star polyhedron can be thought of as ‘topological’ as they emphasize the internal connectedness of these self-intersecting figures.

Since then, I have folded some more polyhedra following the same idea, and started naming them after actual stars (seeing as they are “star” polyhedra). I will presenting on some of the math and design thoughts for this series at the 6th International Meeting on Origami in Science, Mathematics and Education (6OSME) in Tokyo and displaying two of them at Bridges 2014 in Seoul, Korea later this summer.

Unukalhai, below, is a ‘topological’ model based on the Small Triambic Icosahedron and is composed of 60 rectangular sheets of paper folded into identical origami units. Each face is represented by a 3-pronged spiral, and can be thought of as a subsection of a small triambic icosahedron, chosen such that the model can be joined together without self-intersection. Unukalhai was made out of five colors of paper to highlight the natural five-coloring of the icosahedron.

DSC_9380

Tania Australis was the first star polyhedra origami piece that I folded, and has been mentioned on this blog before. It is composed of 30 identical ‘S’ shaped pieces that each represent one face of a Great Rhombic Triacontahedron and was inspired by George Hart’s Frabjous sculpture

Origami Starwave

Tania Borealis is composed of 30 ‘S’ shaped pieces, put together in the shape of a Medial Rhombic Triacontahedron. It complements Tania Australis, but is much more fragile, so I do not plan to put it on display in Asia.

DSC_9376